- > Dune Awakening Ruins of Tsimpo Guide: A Veteran Player’s Deep Dive
- > Dune: Awakening Patch 1.3.10.0 Guide (Full Breakdown for Players)
- > Dune: Awakening Patch 1.2.10.0 – All Major Changes and Features Explained
- > Dune Awakening Lost Harvest – Everything You Need to Know About the First DLC
- > Particulate Filter Dune Awakening – How to Get, Craft, and Use It
- > Dune Awakening Dunewatcher Guide – How to Get, Craft, and Master This Legendary Rifle
Dune: Awakening – The Price of Rejection Contract Guide
If you’ve been grinding your way across the unforgiving deserts of Dune: Awakening, you already know this is not your average survival MMO. Funcom has done a brilliant job of fusing the rich lore of Arrakis with intense stealth, strategy, and player-driven economy. One standout Mentat Contract you absolutely shouldn’t skip is The Price of Rejection. This quest doesn’t just deliver a heap of Solari—it’s a showcase for how stealth mechanics and clever gadgets set Dune: Awakening apart from anything else out there.
In this guide, I’m breaking down everything you need to know about Dune Awakening The Price of Rejection. Whether you’re just unlocking the Mentat path or you’re a hardened player optimizing your Solari income, this walkthrough will help you finish the contract smoothly and reap the rewards.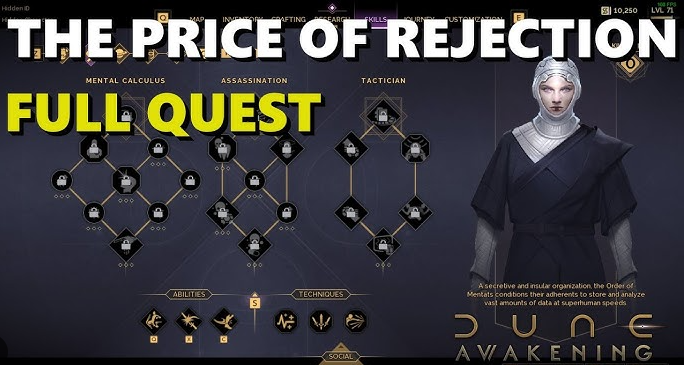
What Is The Price of Rejection in Dune: Awakening?
The Price of Rejection is a high-stakes Mentat Contract that feels almost like a tactical mini-campaign inside the larger game. Your mission: infiltrate the heavily guarded Passage of Artemis, eliminate an informant using a Hunter-Seeker drone, and cover your tracks with a Poison Mine.
If you’ve played through other contracts, you’ll notice this one demands more precision and awareness than most. You’ll need a solid grasp of stealth, timing, and how your Mentat gadgets work. That’s why a lot of veteran players use this mission to master the drone mechanics and sharpen their infiltration skills.
Rewards and Why You Should Prioritize This Contract
Let’s be blunt: the rewards are too good to ignore.
Completing The Price of Rejection will grant you:
-
700 XP (great for leveling your Mentat skill line)
-
5,500 Solari (that’s a hefty chunk to put toward gear, vehicles, or even building your personal holdings)
-
Source of Power Capstone Skill, a major unlock for Mentats
If you’re on the fence about focusing on Mentat Contracts versus other quest lines, this mission alone can tip the balance. That Source of Power skill is critical if you plan to push your build into late-game PvP or high-difficulty raids.
How to Start The Price of Rejection
You’ll pick up the contract from Zayn De Witte, who hangs out in Arrakeen. If you’ve completed earlier Mentat missions, this one unlocks automatically as your next progression step.
Tip: Before you even think about heading into the Passage of Artemis, double-check your loadout:
-
Carry Hunter-Seeker charges if you haven’t unlocked unlimited uses
-
Make sure you have the Poison Mine from your Assassination skill tree
-
Equip movement-enhancing gear to get out of trouble fast
Trust me, nothing feels worse than making it halfway through and realizing you forgot the right gadget.
The Price of Rejection Walkthrough
Here’s a step-by-step guide based on my own playthroughs and what I’ve seen work best for other experienced players:
1. Enter the Passage of Artemis
Where to find it:
The Passage of Artemis is tucked into the Western Shield Wall region, way up at the northern edge of the map. If you’ve been exploring the southern dunes, expect a decent hike or a Sandcrawler ride to get there.
Pro tip:
Keep an eye out for roaming patrols. The place is crawling with Harkonnen mercs who will spot you from a distance if you approach on foot.
2. Place a Solido Decoy as a Distraction
This is where things start getting interesting. The Solido Decoy is your first piece of misdirection.
How to use it effectively:
-
As soon as you enter the Passage of Artemis, deploy the decoy near the main guard cluster
-
While they’re distracted, sprint up the left side toward the tall building with the bridge
-
Don’t linger—guards will only stay confused for about 15 seconds
Many new players don’t realize the decoy’s range isn’t infinite. Stay close enough to draw attention away from your movement.
3. Infiltrate the Annex with the Hunter-Seeker
Next, you’ll switch to the drone perspective. This is the make-or-break moment for most players trying Dune Awakening The Price of Rejection the first time.
Quick checklist:
-
Look for the 3rd floor vent entrance on the front side of the Annex
-
Make sure your character is hidden behind cover
-
Keep your Hunter-Seeker’s battery in mind—it has limited operating time
If you’re not used to piloting the Hunter-Seeker, spend a few minutes in free roam to practice. Its handling takes getting used to.
4. Deploy the Hunter-Seeker
Once you’re in position, deploy your drone. You’ll notice your field of vision shrink—this is where many players panic.
Stay calm and do this:
-
Stay in cover so you’re not attacked while controlling the drone
-
Use small adjustments rather than big swings to navigate the vents
-
Watch the yellow highlight on your target—this makes identification simple
5. Assassinate the Informant
This part is honestly one of my favorite sequences in the game. You get that satisfying feeling of executing a perfect infiltration.
When your drone lines up with the target, simply left-click to launch the Hunter-Seeker. It’ll streak forward, instantly killing any enemy in its path. If you see extra guards nearby, you can still finish them off before your battery depletes.
Reminder:
After the kill, your presence will be suspected. This is why you need your Poison Mine ready.
6. Place a Poison Mine to Cover Your Tracks
Here’s the last step before you exfiltrate:
-
Navigate back out of the annex (or simply exit drone mode)
-
Use your Poison Mine ability in the same hallway or near the vent entrance
-
This will trigger a toxic cloud that prevents the guards from fully investigating your route
Once you’ve planted it, you’re free to leave the Passage of Artemis. This action also auto-completes the contract objective.
7. Report Back to Zayn
Head back to Arrakeen and speak to Zayn De Witte again. He’ll confirm the job is done and grant your rewards.
And that’s it—you’ve just wrapped up one of the most rewarding and well-designed Mentat Contracts in Dune: Awakening.
Why You Should Master The Price of Rejection
Completing this mission does more than earn Solari and XP. It teaches you:
-
Hunter-Seeker mechanics, which you’ll need for endgame contracts
-
Effective use of decoys and mines for stealth approaches
-
Map awareness—especially in vertical, multi-level locations
If you plan on dominating PvP or higher-tier contracts, mastering these techniques early on makes you a far more dangerous player.
Extra Tips for Veterans
Because this guide is coming from someone who’s logged hundreds of hours in Dune Awakening, here are a few bonus strategies:
-
Farm Solari Efficiently: Pair this contract with nearby scavenging runs for even more currency.
-
Practice Drone Routes: Use low-risk locations to practice Hunter-Seeker handling so you never fumble during critical missions.
-
Invest Solari Wisely: Don’t blow your 5,500 Solari reward on cosmetic items. Save up for crafting schematics, Sandcrawler upgrades, or resources to fuel your faction efforts.
And if you’re looking for a trusted marketplace to stock up on Solari or rare items, check out G4mmo—they’re well-known among long-time players.
You may also like Making a Martyr Contract
Final Thoughts
The Price of Rejection is easily one of the most iconic contracts in Dune: Awakening. It doesn’t just test your skills—it makes you feel like a true operative navigating the lethal politics of Arrakis. Whether you’re in it for the thrill of stealth or the big Solari payout, this quest is a must-play.
So get out there, set your decoy, deploy your Hunter-Seeker, and prove you’re more than just another face in the desert. In Dune Awakening, only the most cunning survive—and this contract is the perfect way to sharpen your edge.
Recommended Article


 Email
Email Discord