
- > ARC Raiders Search Lockers Trials Guide: Best Maps, Routes, Tips and How to Get 3 Stars Fast
- > How to Get the Canto Blueprint in Arc Raiders
- > How to Get THE FINALS Skin in ARC Raiders
- > How to Complete Battening Down Quest in Arc Raiders
- > How to Get the Frequency Modulation Boxes in ARC Raiders
- > ARC Raiders Crane House Key Guide: Location, Loot, and Best Farming Tips
Snap and Salvage Arc Raiders Quest: Complete Veteran Guide to Finishing Tian Wen’s Stella Montis Mission
If you have spent any amount of time diving into the chaos of ARC Raiders, you already know the drill: every new map, every new zone, every new task finds a creative way to push you into danger before it hands you the reward. And among all the early-to-mid game missions, the Snap and Salvage ARC Raiders quest stands out as one of the first that really tests whether you can navigate Stella Montis without getting turned into scrap yourself.
This quest is deceptively simple on paper, but if you have tried to complete it already, you know there’s nothing “simple” about dodging Shredders in tight hallways, navigating the Sandbox while Sentinels scream for backup, and hoping RNG blesses you with the materials Tian Wen wants. So if you are stuck, confused, or just want to get it done efficiently, I’ve got you covered.
This is a full veteran player walkthrough for Snap and Salvage ARC Raiders, written in a human conversational tone, and built to give you practical strategies rather than generic instructions. We’ll walk through every phase step-by-step, break down the best spots to check for Magnetrons and Flow Controllers, and help you avoid the traps, enemies, and dead ends that turn this quest into a headache for new Raiders.
Let’s dive in.
Why Snap and Salvage Feels Different From Other Stella Montis Missions
By the time you unlock the Snap and Salvage ARC Raiders quest, you’ve already had a taste of Stella Montis through missions like In My Image and Cold Storage. Those quests serve as your warm-up laps. Snap and Salvage turns things up a notch. Instead of just taking a photo or opening a drawer, this mission throws you into a four-part loop with multiple enemy types, vertical layouts, and the dreaded RNG hunt for materials.
The core structure is simple:
-
Take a photo of a Rover in the Sandbox
-
Search papers in the Security Checkpoint
-
Find a Magnetron
-
Find a Flow Controller
-
Deliver everything to Tian Wen
But what makes it frustrating is that unlike the first two steps, Magnetrons and Flow Controllers aren’t guaranteed spawns. These are Exodus materials, and that means RNG rules everything.
Because of that, your experience with the Snap and Salvage ARC Raiders quest can go one of two ways:
You get lucky and finish in one run
You suffer through three, five, or ten reset loops praying for salvage drops
This guide is all about pushing that first scenario as much as possible.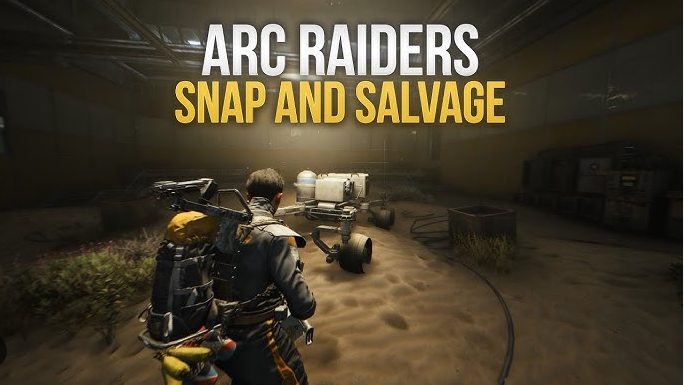
Step 1: Where to Take the Photo of the Rover in the Sandbox
Your first objective sends you straight to the lower layer of Stella Montis. Your target is the Robotic Sandbox, located near the center of the map. If you zoom in, you’ll see two sand-filled rooms with dunes, ramps, and platforms. Inside are two Rover vehicles that look like dune buggies.
Pro Tip From a Veteran:
You don’t need to worry about angles or distance. You don’t actually “take a photo” like you would in other games. Just walk up to the Rover and interact. Done in seconds.
What slows players down isn’t the task, but the patrols.
Enemies Common in the Sandbox
Shredders
Fireballs
Pops
Sentinels
Other Raiders attracted by the noise
My advice is to enter from the southern side if you want a calmer approach. Raiders tend to congregate more heavily on the west and north corridors, so sliding in from the south reduces the chance of a three-way fight.
Once you interact with one of the Rovers, you’re done. Head back toward the upper levels to begin Step 2.
Step 2: Where to Find the Security Checkpoint Papers
Next, the Snap and Salvage ARC Raiders quest sends you to the Security Checkpoint, located just east of the Lobby. You’ll see the text “Security Bridge” on your map. Just follow that and you’re practically standing on top of the checkpoint entrance.
Look for the door labeled “Security Restricted Access.”
Sometimes the upper floor door is locked, so you might need to breach. Not every instance requires it, but be ready.
Once you’re inside, head down to the ground floor. You’re looking for a small office overlooking the lobby through a slitted window. On the counter is a stack of papers that glow yellow. Interact, and the second step is complete.
Veteran Tip
Crossing the metal detector will make noise and can pull nearby ARC units or Raiders. If you’re already low on health or want to avoid a fight, take one of the side routes in or enter from the top floor instead of charging the main gate.
With the Security Checkpoint objective checked off, get ready for the real test.
Step 3: Where to Find Magnetrons in Snap and Salvage
This is where the Snap and Salvage ARC Raiders quest begins to lean heavily on RNG. The Magnetron is an epic-tier Exodus material, meaning it can spawn anywhere that Epic loot is allowed. There’s no fixed spawn, no guaranteed container, no “always here” location.
But some areas are consistently better than others.
Best Places to Look for Magnetrons
Security Checkpoint interior
Atrium-Lobby connecting corridors
Assembly Workshop
Side offices near Arena
Storage closets and maintenance rooms
The Magnetron I personally found appeared inside a large gray storage container tucked into a side room near the Atrium-Lobby corridor. I’ve also found them in tool cabinets and metal drawers inside the Assembly Workshop.
Why the Security Checkpoint is a Top Tier Magnetron Farm
Players frequently overlook this, but the Security Checkpoint can spawn:
Rare materials
Epic Exodus items
High-tier salvage
I’ve found multiple Epic crafting materials here across runs, which lines up with community reports.
How to Make RNG Less Painful
Bring a safe pocket
Run Stella Montis solo so no one else steals the spawn
Clear roaming Shredders because they tend to bounce between rooms and ruin loot paths
Search the upper and lower floors of every room
If you don’t find a Magnetron, extract, reset, and try again. Fortunately, Stella Montis is one of the more friendly maps since Raiders are busy fighting ARC most of the time.
Step 4: Where to Find Flow Controllers in Snap and Salvage
The Flow Controller is the second salvage item you need for the Snap and Salvage ARC Raiders quest, and while it’s still RNG-based, it’s slightly more common since it’s a rare-tier item instead of epic.
Best Places to Find Flow Controllers
Medical Research Labs
Lobby-adjacent offices
Security Checkpoint first floor desk drawers
Assembly Workshop upper rooms
Side storage compartments
The most reliable location I’ve seen and experienced is the first floor office inside the Security Checkpoint, in the desk drawer. Mine was sitting right in the drawer, and other players have reported the same.
The Medical Research Labs are also worth sweeping because they tend to spawn multiple rare materials throughout their interconnected hallways.
Safe Pocket Reminder
The Flow Controller does not auto-register for the quest.
You must carry it back in your safe pocket.
If you die with it, it’s gone.
Don’t be that Raider who finds both items then gets shredded by a random Fireball on the way out.
Final Step: Delivering Everything to Tian Wen
Once you have both items, return to Tian Wen in Stella Montis. Hand over the Magnetron and Flow Controller to complete the Snap and Salvage ARC Raiders quest.
Your reward includes:
Burlette
Silencer
Extended Light Mag
100 Light Ammo
It’s not the craziest reward in the game, but it absolutely helps build momentum for upcoming encounters, especially if you’re experimenting with new weapons or crafting new Arc raiders items.
Veteran Tips to Finish Snap and Salvage Faster
After grinding this quest enough times, here’s what I recommend if you want to finish it efficiently without running loops for hours.
1. Run Stella Montis early morning or off-peak
Less player traffic means less competition for loot and fewer third-party engagements.
2. Always sweep from bottom to top
The Sandbox has the simplest objective, so knock it out first.
3. Don’t waste time killing everything
You’re gathering, not clearing. If a Fireball isn’t blocking the hallway, keep moving.
4. Check containers, drawers, and storage bins
Exodus materials are almost always container-based.
5. Extract the moment you find what you need
Greed runs cost lives. And lost salvage.
6. Bring one high-precision primary and one close-quarters backup
Shredders are dangerous in tight rooms, but Sentinels die fast to mid-range shots.
Should You Run Snap and Salvage With a Squad?
You can, but I usually recommend running it solo, unless you trust the squad. In group runs, loot is divided and some players grab everything without thinking. Since you only need two specific materials, you want to control what you loot.
However, if you’re brand new or low on power, a squad can help keep enemies off your back long enough for you to search rooms without stress.
Final Thoughts on the Snap and Salvage ARC Raiders Quest
The Snap and Salvage ARC Raiders quest is one of those missions that teaches you how to navigate Stella Montis like a real Raider. It forces you to learn spawn patterns, room layouts, enemy routes, and salvage tricks. Once you finish this quest, the rest of the map becomes far more manageable.
Be patient, sweep methodically, protect your materials, and extract as soon as you get the Magnetron and Flow Controller. And if you want to gear up faster for these types of quests, some players even check third-party marketplaces like G4mmo for bundles, though personally I prefer finding my own loot.
Either way, Snap and Salvage is your rite of passage in Stella Montis. Complete it once, and you’ll never struggle with it again.
If you're ready, get out there, gear up, and make Tian Wen proud. Raiders don’t hesitate — they adapt, they salvage, and they survive.
Recommended Article


 Email
Email Discord