
- > ARC Raiders Search Lockers Trials Guide: Best Maps, Routes, Tips and How to Get 3 Stars Fast
- > How to Get the Canto Blueprint in Arc Raiders
- > How to Get THE FINALS Skin in ARC Raiders
- > How to Complete Battening Down Quest in Arc Raiders
- > How to Get the Frequency Modulation Boxes in ARC Raiders
- > ARC Raiders Crane House Key Guide: Location, Loot, and Best Farming Tips
Arc Raiders Lost in Transmission Quest Guide
If you have been running contracts for Shani in ARC Raiders, you already know some quests are simple loot runs while others send you straight into contested territory. Lost in Transmission is one of those missions that looks short on paper but can turn into a full blown firefight if you are not prepared.
In this Arc Raiders Lost in Transmission quest guide, I will walk you through how to get the Control Tower Key, where to find Control Tower A6 on Spaceport, how to reach the terminal, and how to extract safely in one run. I will also share some practical survival tips from actual raid experience so you do not have to learn the hard way.
Lost in Transmission Quest Objectives
Lost in Transmission is given by Shani and takes place on the Spaceport map. Your objectives are straightforward but must be completed in a single raid.
Visit Control Tower A6
Reach the top of Control Tower A6
Establish a connection from the terminal
That is it. No complicated puzzle. No hidden switches. The danger comes from other players and the fact that the Control Tower A6 key room is known for high value loot.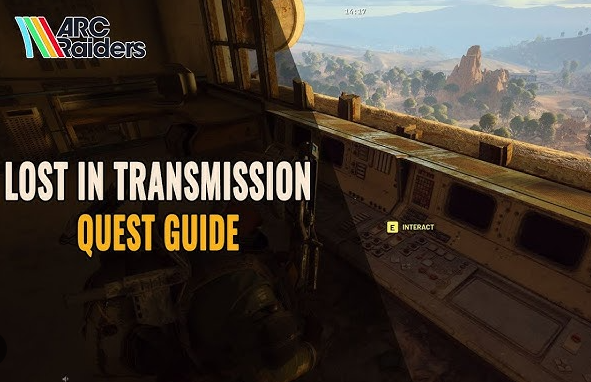
How to Get the Control Tower Key in ARC Raiders
Before you even think about stepping into Spaceport, you need the Spaceport Control Tower Key. Without it, you cannot unlock the door that leads to the zipline up to the control room.
The tricky part is that there is no guaranteed spawn location. The Control Tower Key is a random loot drop. That means you need to farm intelligently.
From experience, Dam Battlegrounds is one of the more reliable maps for key hunting. Focus on areas packed with containers. Cabinets, drawers, desks, and lockers are your best friends.
Strong spots include
Ruby Residence
Pale Apartments
Research and Administration Building
These locations tend to have higher density loot containers, which increases your odds of pulling a Control Tower Key.
When you finally get the key, immediately place it in your Safe Pocket. I cannot stress this enough. If you die and the key is in your main inventory, you lose it. If it is in your Safe Pocket, it stays with you even if you get knocked out.
Control Tower A6 Location in Spaceport
Control Tower A6 is located in the lower middle section of the Spaceport map. It is not subtle. It is a tall, obvious tower that stands out from most surrounding buildings.
Once you unlock Spaceport, navigating to the tower is relatively straightforward. Still, do not sprint blindly toward it. This is a high traffic zone. Many players know the loot inside is valuable, so the tower often becomes a hotspot.
If you are running Lost in Transmission, consider approaching from a side angle instead of charging in through the most obvious path. Scout first. Listen for gunfire. Watch for open doors.
Entering Control Tower A6 Safely
When you reach the ground floor of Control Tower A6, you will notice something important. There are actually two locked doors inside.
One is in the main entrance area.
The other is in a side room filled with red lockers and desks.
Both doors lead to the same zipline that takes you to the top.
Before using your Spaceport Control Tower Key, check if either door is already open. If one is unlocked, that usually means another raider has already gone up.
At that point, you have choices.
You can wait and ambush.
You can attempt to negotiate if voice chat is active.
Or you can take the zipline up and prepare for a fight.
As a veteran player, I recommend clearing the lower floor carefully first. Control Tower A6 is a known loot room. If you hear movement upstairs, assume the player is geared and ready.
You may also like Arc Raiders Armored Transports Quest
Reaching the Top of Control Tower A6
After unlocking the door, you will see the zipline. Interact with it and ride it up to the control room at the top.
This is the point where many players get eliminated. The top room has limited entry points, which makes it defensible. If someone is already up there holding angles, pushing blindly can get you deleted in seconds.
Use audio cues. Move slowly. Pre aim corners. If you are in a squad, coordinate before ascending.
Once you clear the top room or confirm it is safe, your objective will update. Now you must establish a connection from the terminal.
Establishing a Connection from the Terminal
Inside the control room, look to the left side. You will see a terminal. Interact with it to establish the connection.
The moment you complete this interaction, the Lost in Transmission quest objective updates and the quest is essentially complete.
Important detail. You must complete all steps in a single run. If you reach the tower but fail to interact with the terminal before dying or extracting, you will need to redo the tower portion.
After interacting with the terminal, do not rush out immediately. This room is one of the better loot spots on Spaceport. Check containers, crates, and any high tier spawn points.
Many players specifically farm Control Tower A6 for strong arc raiders items, so it is worth taking a few extra seconds to grab value.
Extracting After Completing Lost in Transmission
Once you have established the connection and looted the room, take the zipline back down.
Now the focus shifts from objective completion to survival. Other players may be rotating toward the tower if they heard shots. Extraction routes can also be camped.
Move deliberately. Avoid unnecessary fights. Choose an extraction point that is not the most obvious on the map.
Remember, the quest only truly feels done once you return to Speranza safely.
Rewards for Lost in Transmission
Completing Lost in Transmission rewards you with the Snap Hook. Depending on your playstyle, this can add mobility and utility to your loadout.
Quest rewards in ARC Raiders are not just about items. They also unlock progression, new contracts, and faction standing. Lost in Transmission is a key stepping stone in the Shani questline.
Pro Tips From a Veteran Raider
Let me give you a few real world tips that are not obvious in basic walkthroughs.
First, do not run this quest solo if you are under geared. Control Tower A6 attracts PvP. A duo or trio dramatically increases your survival odds.
Second, time your run. Early match pushes are riskier because aggressive teams rush key rooms. Mid raid rotations can be safer if the initial wave of players has already fought and left.
Third, do not tunnel vision on the objective. Many players die because they focus only on the terminal and ignore footsteps behind them.
Fourth, if you are struggling with gear consistency, some players supplement their loadouts with Arc Raiders items from trusted marketplaces like G4mmo once to stabilize their progression. That said, solid map knowledge and positioning will always matter more than raw equipment.
Common Mistakes to Avoid
Forgetting to bring the Control Tower Key into the raid. This sounds obvious, but it happens more often than you think.
Failing to place the key in your Safe Pocket. Losing it after one unlucky firefight hurts.
Using the key without checking if a door is already open. You might walk into an ambush.
Leaving without interacting with the terminal. If you do not complete all objectives in one run, you reset progress.
Final Thoughts on Arc Raiders Lost in Transmission
Lost in Transmission is a perfect example of what makes ARC Raiders intense. Simple objective. High risk location. Player driven danger.
As long as you secure the Control Tower Key, approach Control Tower A6 carefully, and interact with the terminal before extracting, the quest itself is straightforward.
The real challenge is managing player threat and knowing when to fight and when to disengage.
Take it slow. Listen more than you sprint. And treat every zipline ride as if someone is waiting at the top.
Complete it cleanly, extract safely, and you will move one step deeper into the ARC Raiders endgame progression.
Recommended Article


 Email
Email Discord